Showing posts with label links. Show all posts

29 August 2012

Create New File vs. Upload New File

Students will have easier access to content topics if they are web pages instead of MS Word documents. For the latter, students must have the appropriate software installed on their computers and understand how their browsers handle links to files. Since formatted text can be copied and pasted into the Desire2Learn text box editor, it is easy to convert your Word documents into web pages:

  1. Open your file in MS Word
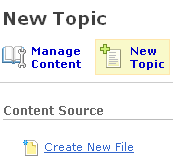
  2. In Desire2Learn, create a new content topic and select Create New File
  3. Select the relevant text in MS Word and copy it
  4. Paste that text into the text box in Desire2Learn
In the text box you can also insert a quicklink, so you can link from this page out to another web site or to a component inside your course (a discussion topic, quiz, or dropbox folder).

By making your documents web pages, your students get quick access and spend less time fiddling with downloading files or dealing with browser security settings. A benefit for you is you can edit the document online using Desire2Learn's built-in web page editor.

27 August 2012

Add an External Link to the Navbar

On your navbar you can add a link to an external website, which will be visible to students from any page inside your course offering:
  • Click on the pencil icon () in the upper-left corner of your course navbar to edit it.
  • Click the Actions button of the navbar (Bottom Left, etc.) where you want to add the external link.

  • Click on Add New Custom Link.

  • Enter your link information.
  • Type in the Name you want the navbar to display (this is what students will click on to activate the link).
  • Include the full URL of the external link (i.e., include the http://).
  • It is a good idea to force external links to open in a new window, else your students may lose your course offering page when they close that external web site.

  • Choose your windows dimensions and options.
  • Click the Save and Close button to close this window.
  • Your new link will appear on the navbar.

This link will be copied as part of the navbar copy from one course account to another.

Notes on Links

Characteristics of Links, which is a navbar option that allows you to add an annotated bibliography of external web sites:
  • Neither the categories nor links can be restricted (by date or release condition)
  • All categories (including the category description) and links (including the link description) appear by default on the links page
  • If you change the default setting and turn off open in new window, the linked page will replace the entire Desire2Learn page (not just the bottom frame of the page), so I strongly recommend leaving the default option for links.
You can add external links as quicklinks to just about any text box, so if you want to have more control over them you can include several as part of a content topic, for example. Also note that there is a widget called User Links that you can use to add your links to your course homepage, independent of its appearance on the navbar. However, you must first create the links via that navbar link before they will appear in the User Links widget.

24 August 2012

Link to a Course File from the Navbar

You can link to a course file directly from the navbar. This is a useful way to make an important file to students always available, no matter where they are inside your course offering.
The file must first be in your Manage Files area. If you uploaded it as a content topic, it is already there. If not, here are the steps:
  1. Go to Edit Course and then the Manage Files page.
  2. Click the upload button to select a file from your local computer to add to this page.
Once a file is in your Manage Files area, you can add a link to it on the navbar:
  1. Go to Edit Course and then the Navigation page.
  2. Click the name of the currently active navbar for your course. Note: The default active navbar for CRC courses is called "CRC_brand_NavShell (Go Hawks!)."
  3. Click on the Links tab.
  4. Click the Actions button of the navbar (Bottom Left, etc.) where you want to add the file link.
  5. Click on Add New Custom Link.
  6. Type in the Name you want the navbar to display (this is what students will click on to activate the link).
  7. Click on the Insert Quicklink icon.
  8. Choose the Category of where the particular file is located, then under Content select file and click the Insert button.
  9. Select if you want the link to appear in the Same Window with Navbar, Entire Window or New Window then click the Save and Close button.
  10. Refresh your page and the new link should appear in the navbar.

29 September 2011

Respondus LockDown Browser and external links and files

Respondus has posted a blog entry on how to use external links and files in a quiz that  requires the use of their LockDown Browser:

Respondus LockDown Browser: Using External Links and Files

24 February 2009

External Links on the Course Homepage

The bookmarks in D2L are generated by students as they opt to bookmark content topics. They are created individually, so each student can decide what to add to their Bookmark widget. Bookmarks cannot be links to outside web pages (though the content topic that they link to can be a quicklink). There are three ways to add a link yourself to the course homepage:
  1. Create a News item and include a quicklink in the item's content. If you do not set any calendar restrictions on the item and keep it at the top of your news widget, it will always be visible.
  2. Create a custom widget and add to your course homepage.
  3. Create a custom navbar link. This has the advantage of always being visible, no matter where students are in your course.