16 December 2014

See what a particular student sees on the Grades page

To see what a particular student sees when that student clicks on the Grades link, follow these steps:
  1. Go to Grades and click on the Enter Grades link.
  2. Click on the name of a student - this will show you all of the grades for that student in an editable format, so you could provide feedback for that student.
  3. Click on the action menu next to the student's name and select Preview - a new browser window opens with that student's view of that student's grades.

Rubrics, Dropbox, and Grades

Rubric assessment does not carry through to the grades tool. The score does (and comments can) if you use it as a scoring rubric but not the rubric assessment data. So linking the same rubric to a dropbox folder and its associated grade item *will not* automatically the rubric data from the dropbox folder to the associated grade item. Students can see rubric data but they have to look at the feedback within the dropbox tool. If you want the rubric data visible on the grade tool you will need to provide that data manually. Provide overall feedback for the grade item directing students to see rubric assessment info within the dropbox tool. 

15 December 2014

Another Way to Do a Letter Final Grade

Though you can create a grade scheme that displays the total points earned as a letter grade instead of a percentage, you may want to allow for another way to allow for the "Smith factor" besides creating additional hidden grade items or changing extant grades as described in this post. You can also create a second grade item that is solely for the course's letter grade.

12 December 2014

Copying course material and notifications

Be aware that when copying material into a course offering that is active, any users in that course offering who subscribe to notifications will receive notifications as appropriate for the new materials as soon as they appear. This can confuse students if you copy a News item, for example, that includes information about upcoming class events or due dates and you plan on editing those dates after you copy the News items over. (Users who sign up for News notifications receive an alert immediately when a News item is posted.) Similar situations will occur with Dropbox folders and Quizzes, which provide notifications two-days before end dates or due dates.

The decision to receive notifications is the student's, and they can choose text messages and/or email. Safer options are either to change dates and/or content in the source course offering before copying stuff over or creating items manually.

02 December 2014

Bonus grade items in a weighted grading system

When working with a weighted grades system, any bonus items that are not part of another category should be standalone items and not part of a category (i.e., do not create a category that only contains bonus items). This is because each category in a weighted grade system must have a weight. For standalone bonus items, the weight should be the maximum amount of grade weight you want changed if students successfully complete those bonus items.

29 October 2014

Training videos from D2L

Earlier this semester D2L released free all of their training videos on how to use their various tools. The videos are captioned, effective, and listed alphabetically by tool title on the following web page:

https://community.brightspace.com/resources/videos

22 October 2014

Attendance and Grades

I have found the following steps to be a good way to use the Attendance tool and the Grades tool. Unfortunately data from the Attendance tool cannot be pushed directly to the Grades tool. Here are the steps I take in my face-to-face history class:
  1. Create a grade item that covers multiple class meetings (in my case I do two, one for each half of the semester).
  2. Create attendance registers that match the grade items (each register will have one session per class meeting).
  3. After the last date for each attendance grade item, export the data from the attendance register (click on the name of the register to view the data and then click the Export All Data button). This creates a .csv file that can be opened in MS Excel, where the "% Attendance" field can be used to determine the grade for that register.
  4. Follow the export and import steps detailed in the Importing Grades post in this blog (it might be helpful to export only the attendance grade item to make copying and pasting data from one Excel file to another easier). Be sure to follow exactly the directions regarding file format.
  5. The import process takes a few steps, and the third step previews the data before you import it to your grades tool.

22 September 2014

View Grade for Dropped Students

The grades for students that were dropped from a class cannot be exported from a class but are available on a student-by-student basis. To see them, click on the Enrollment Statistics button on the Classlist page.


Then click on the action menu for the student and then View Grades.


The attempts for quizzes and dropbox folders are not visible unless the student's user is enrolled in the class.


18 September 2014

Grading Discussion

The summer 2014 update to D2L introduced some changes to the discussion tool that affect grading. No longer can discussion be graded in context and can only be done by looking at all of the posts for a user via the Topic Score dialog.

The embedded video shows the process that I now use to make things a little bit easier. It involves periodically switching between the Grades and Discussion tools.

Here are the steps that I take in the video:

  1. Go to the Enter Grades page for the grade item that is associated with the discussion topic that has new messages.
  2. Click on the View Submissions icon that indicates unread posts from this student.
  3. Grade the submissions using the Topic Score dialog that pops up.
  4. Switch to the Discussion tool to mark that student's graded posts as read.
The greatest risk is that I will miss a student's contribution that happens to occur during grading.

16 September 2014

Grading Matching Questions

I found a helpful web page that included this succinct explanation of how the grade options work for matching questions:
NOTE: In the Choices section, be sure to choose a grading option. 
Equally weighted (Recommended)
The points for the question are divided evenly among all the matches.EXAMPLE: If a matching question worth 5 points has five matches, and a student correctly matches three of them, the student will receive 3 points.
All or nothing
If the matches are not all correct, the student will receive zero points for the question. EXAMPLE: If a matching question worth 5 points has five matches, and a student correctly matches three of them, the student will receive 0 points.
Right minus wrong
The points for the question are divided evenly among the matches, EXAMPLE: If a matching question worth 5 points has five matches, and a student correctly matches three of them, the student will receive 1 point.
Thanks to our friends at the University of Wisconsin-Eau Claire for making this resource available.

11 September 2014

Exclude a grade item for a particular student

The points possible for the final grade in a course offering is the same for all students, as it is a sum of the points possible for all items that do not have the box checked to "Exclude from Final Grade Calculation." If you want to exclude a particular grade item for certain students, there are a couple of ways to handle this:

Drop Ungraded Items


On the Calculations Options page is a radio button to "Drop ungraded items." If this is selected, then the points possible for the Final Calculated Grade for an individual student will not include a grade item that does not have a score associated with it. To see this option, click on the Settings link on the Grades page and then the Calculation Options tab.


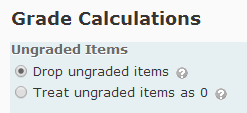
This means that different students will have a different points possible for the Final Calculated Grade.

Use Formulas


The other option is to create a Formula grade item for each possible situation. On the Manage Grades page, click on the New button, click on Item, and click on the Formula for the Grade Item Type. On the New Item page, you will need to use the Formula Editor to calculate the Points Received for this item. The Formula Editor dialog requires you to select each grade item you want to include as a variable in the formula and then select each operator as well. There is limited keyboard functionality, so be prepared to exercise your mouse pointer.


If you choose this option, do not release the Final Calculated Grade as it will confuse those students who do not have to complete all of the assignments in the class.

02 September 2014

Manual Enrollment

Our integration with PeopleSoft takes care of all official enrollment transactions related to students, including drops, but you can still manually enroll another user (student or faculty).

NOTE: The enrollment status for manually enrolled users must be changed manually and will not be changed based on any changes in the user's official enrollment status (i.e., a "Wait_listed" user will not be changed to "Student" if the student officially enrolls in the class; nor will that user be removed from a D2L course offering if the student does not officially enroll in the class).
  • On the Classlist page, click Add Participants and then click on Add an existing user
  • Type a name or username into the search box and click the Search button
    Note: A user already enrolled in your course offering will not appear on the search results page.
  • Click in the check box to select the correct user and assign a role in your course offering:
    • Student
    • Instructor
    • TA-Grader has access to the grades tool and can assign grades
    • TA- Discuss has access to the discussion tool and can create forums and topics
    • Leader - this role has the same privileges as an Instructor and is for club and organization accounts
    • Member - this role has the same privileges as a Student and is for club and organization accounts
    • Wait_listed - this role has the same privileges as a Student and is there to remind you that this user is not officially enrolled in your class (you can remove or change this user's role once the student's status is resolved)
  • For course accounts, a manually enrolled user must be assigned to a section (this does not apply to club and organization accounts)
  • Click the Enroll Selected Users button. Note that there is an option to send an enrollment email.

29 August 2014

Grading Discussion (since August 2014)

Grading discussion as you read appears no longer to be an option, which is quite frustrating. Here are the steps I plan to follow:
  1. Open two browser tabs, one on discussion and the other on grades
  2. In the grades tab, click on the action menu for the discussion topic’s grade item and select Enter Grades
  3. For each student who has contributed to that topic, a bubble appears in the Submissions column. Click on the bubble and a feedback window opens for that student for that grade item.
  4. The feedback window includes all of the posts made by that student within that topic and a place to type a score and feedback. Make sure to check the Published box so the score is transferred to the grade item when Save is clicked.
  5. In the other browser window, mark as read all the discussion posts that were just graded. Fortunately a topic can be searched for all posts by a student by typing the student’s name in the search box and then marking all results as read by clicking the action menu for any of the posts in the search results.

I guess I could grade in context by reading the posts in one window and then grading in the other.

11 August 2014

User Progress for Inactive Course Offerings

The active status of a course offering affects the ability to view user progress. When a course offering is inactive, the user progress data linked from the Classlist and View User Progress (linked from the Edit Course page) is limed. The specific data for each tool is always viewable.


06 May 2014

Content Access Stats and Videos

There are three ways to post videos in the content area of Desire2Learn, and the method you choose affects whether the amount of time students spend on the video is recorded:
  1. External link - This is an easy way to link to videos online, especially those that are on servers that are not delivered securely. Whether a student clicks on the link is recorded, but the amount of time they spend is not recorded. It does not matter whether the external link is set to open in a new browser window.
  2. File with a quicklink - This allows the instructor to provide context for the video before the student clicks on it to watch. It also can be set to open in a new browser window, which saves students from having to deal with the security warning for videos that are not delivered securely. The amount of time that students spend watching the video (as long as they do not navigate away from the original content file) is recorded.
  3. Video embedded within a file - For videos delivered securely, this is a nice option. It allows the instructor to type instructional context around the video window and students can watch the video while still within the Desire2Learn course offering. The amount of time students spend watching the video is recorded.
The attached image shows the access stats for the same YouTube video shared with each of these views. 

28 April 2014

D2L Grader App for the iPad

The Grader app allows instructors to download submissions to dropbox folders in their course offerings for offline grading. It is free and only available for the iPad.

31 March 2014

Print Grade Report

The best option for printing a grade report for an individual student is via the User Progress tool, which can be accessed via Enter Grades, Edit Course, or the Classlist.


On the User Progress Page, click the Grades link and then the Print link. Click to expand the Grades Received header if you want all graded items to appear (you may have to click a link to Load More if there are more than ten items).


There is a button on this page to Print.


Note: Students can do this for themselves! They can access their personal progress reports via the View my progress link in the My Settings widget on their homepage.


21 March 2014

Small Logo Navigation Theme Available

A second navigation theme is available for CRC faculty that has a smaller logo and course title and thereby makes more web browser space available for course materials and content. This theme can be applied to any customized navbar, so instructors who have not yet done so will need to make a copy of the default navbar to apply this theme. The demonstration video shows how.


Note that changing the theme will not change any of the links that are on the navbar.

19 February 2014

View Student List by Class of Enrollment

In a course offering that has multiple courses grouped together, it is easy to view students by class of enrollment. This is especially useful when submitting grades at the end of the semester, as the online grades and rosters system only allows us to submit grades for one class at a time.

09 January 2014

Upload Videos to Google Drive and Embed in Desire2Learn

This is cross-posted on Greg's Google Blog

Video files can be uploaded to an instructor's Los Rios Google Drive and then embedded within a course offering on Desire2Learn. This video shows how to do this and includes an option to prohibit downloading by viewers.