The Google Drive application can be used to create an online image gallery with thumbnails that link to higher-quality images.
Showing posts with label images. Show all posts
Showing posts with label images. Show all posts
16 September 2013
Use Los Rios Google Apps to Create an Image Gallery and Share via Desire2Learn
This is cross-posted on Greg's Google Blog
The Google Drive application can be used to create an online image gallery with thumbnails that link to higher-quality images.
The Google Drive application can be used to create an online image gallery with thumbnails that link to higher-quality images.


29 August 2012
Use Google Docs to Create an Image Rotator
You can use a Google Slides presentation to create an image rotator for your course. For example, your students might submit photos to you and you want them to be displayed on your course homepage.
Images for Quizzes
There are two places to store images associated with quiz questions or sections. One is with the question or section itself. There is an option to add an image file and select one from your local computer. The second place to store images is in your course offering files. You can choose this source when you add an image to a question or section. In this second case, you would have had to upload the image files to your Manage Files page before you can add the image to a section or question in a quiz.
The advantage of using a course offering file as a question or section image is that the file is available for your use elsewhere in your course offering. For example, you might display the image in a content topic and then later ask students questions about that same image in a quiz. Note that quiz images stored in this way are not copied from one course offering to another when only quizzes are copied. The corresponding course files must also be copied.
The advantage of using a course offering file as a question or section image is that the file is available for your use elsewhere in your course offering. For example, you might display the image in a content topic and then later ask students questions about that same image in a quiz. Note that quiz images stored in this way are not copied from one course offering to another when only quizzes are copied. The corresponding course files must also be copied.
To add images to a quiz question from a local computer follow the steps below:
- Edit the quiz you want to add images to.
- Under the Layout/Questions tab click the Add/Edit Questions button.
- Click on the question to want to edit.
- On the Image section click the Add a File button.

- Press the Choose File button to browse for the image you want to add, once you have chosen your file click the Open button then click the Upload button to upload the image to the question.

- Your image should now appear on the image section. Once you are done you can Preview the question or just Save.


To add images to a quiz question from your Manage Files follow the steps below:
- Under Manage Files from the Edit Course menu click the Upload icon.
- Select the Choose File button to browse for the image then click Open. *You can upload all your images at once by clicking the Add Another File button.
- Once you have finished choosing your images click the Upload button.
- Then go to the quiz you want to edit.
- Under the Layout/Questions tab click the Add/Edit Questions button.
- Click on the question to want to edit.
- On the Image section click the Add a File button.
- Choose the link Course Offering Files, it will list all of the files from the course. Select the radio button of the image you want then click the Select File button.

- Your image will now appear on the Image section. Preview your image and click Save to finish.

27 August 2012
Adding a Picture to your Profile
- From the D2L My Home click Profile from the My Settings box.
- You will be taken to Edit My User Profile. Click on the Change Picture button.
- Browse and find the picture you want to upload and click Open.
- Click Upload. Once the picture has uploaded on the Edit My User Profile hit Save.
19 August 2012
View Multiple Student Profiles
The profile/image link on the Classlist page are HTML links (not JavaScript), which means you can right-click on their image and open each profile in a new window or tab. They won't all be on the same page, but you can have them all open at the same time.
19 May 2010
Prevent printing
If you have an image or document that you do not want students to be able to print or copy and paste from (e.g., for copyright reasons), there are a couple of ways to do this in Desire2Learn:
 NOTE: It is important that you do not add a quicklink to a PDF file inside a text box in a LockDown browser quiz. If you do, the email link within the Acrobat Reader application will work. And your students will not be able to submit the quiz, which will force them to shut down their computers using the power button. Ouch!
- Use the full version of Adobe Acrobat to attach security to a PDF file. On the Document Properties dialog box (access from the File menu) there is a Security tab. Choose password security and you can require a password to print or copy text and images from the document. Once you set a password, you can upload the document anywhere inside Desire2Learn. Make sure you do not require a password to open the document. Students will be able to download the PDF file to their local computers, even though they will not be able to print it.
- Use the Respondus LockDown Browser and Desire2Learn's quiz tool to images and text within a Desire2Learn web page. You can create a "quiz" and only include text and/or image information as its "questions," and if you require the LockDown browser to view the "quiz" students will be unable to print, copy, or email the information from that page. For images, you can create an Image Information item. This item allows you to upload an image file from your local computer and add accompanying text. For text, you can create a Text Information item. Like other text boxes in Desire2Learn, you can copy and paste formatted text into this box. Students will need to "submit" the quiz in order to close the LockDown browser.

15 January 2009
Use Images in Multiple Locations, Including Quizzes
You may want to use the images in multiple locations in your course, say in the content area as well as part of a quiz question. If you upload the image at the time you create the question, that file will not be available inside D2L for re-use. However, if you upload the image to your Manage Files area first, that image will be available as a course file anywhere inside your course offering, including in a quiz: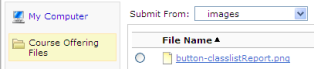
- You may find it helps your organization to create a folder inside your Manage Files area for images (click the
 button to create a new folder).
 - Enter the folder you created by clicking on its name and then upload an image to the folder by clicking the
 button.
 You can upload multiple images simultaneously by packaging them together into a single .zip file. Once you upload the file, a button to unzip it will appear.
 - To display images anywhere in your course, use the Course Offering Files on the Submit a File dialog box and navigate to the location in your Manage Files area where you uploaded your images.
Subscribe to:
Posts (Atom)